Tag Archives: Junos

vSONIC Virtual Switch on EVE-NG

SONiC is an open source network operating system based on Linux that runs on switches from multiple vendors and ASICs. SONiC offers a full-suite of network functionality, like BGP and OSPF, VXLAN that has been production-hardened in the data centers of some of the largest cloud-service providers.

The community around SONiC has been growing and includes Juniper including Apstra, Arista, Nokia, Alibaba, Comcast, Cisco, Broadcom, Nvidia-Mellanox and VMware. SONiC underpins Microsoft’s Azure networking services. According to IDC, a SONiC data-center switch market will be worth $2 billion by 2024.

Some term it as ‘Linux of Networking’.

In this blog, we will see how to spin up a sample topology using vSONIC Virtual Switch on EVE-NG.

To start with, we will use mssonic.yml file which lists the generic parameters for spinning up the instance.

  1. Copy mssonic.yml file into “/opt/unetlab/html/templates/intel” or “/opt/unetlab/html/templates/amd” based on your cpu. In my case, I am using EVE-NG on macbook so I have used Intel.

root@eve-ng:~# ls -l /opt/unetlab/html/templates/intel/ | grep mssonic

-rw-r–r– 1 root root 1993 Jul 30 22:41 mssonic.yml

root@eve-ng:~#

2. Create a folder under “opt/unetlab/addons/qemu/” with name “mssonic-version/” like “mssonic-3.1.2”.

Keyword “mssonic” is important as using this only, eve-ng will recognize this image.

root@eve-ng:~# ls -l /opt/unetlab/addons/qemu/ | grep ms

drwxr-xr-x 2 root root 4096 Jul 30 22:48 mssonic-3.1.2

root@eve-ng:~#

https://github.com/Broadcom/sonic-VirtualSwitch/tree/master/3.1.2

3. Gunzip the .gz file to extract the image file.

root@eve-ng:/opt/unetlab/addons/qemu/mssonic-3.1.2# gunzip sonic-vs-3.1.2.img.gz

root@eve-ng:/opt/unetlab/addons/qemu/mssonic-3.1.2# ls -l

total 2380932

-rw-r–r– 1 root root 2438070272 Jul 30 22:55 sonic-vs-3.1.2.img

4. Rename sonic-vs-3.1.2.img to virtioa.qcow2. Please make sure to rename only and don’t convert it.

root@eve-ng:/opt/unetlab/addons/qemu/mssonic-3.1.2# mv sonic-vs-3.1.2.img virtioa.qcow2

root@eve-ng:/opt/unetlab/addons/qemu/mssonic-3.1.2# ls -l

total 2380932

-rw-r–r– 1 root root 2438070272 Jul 30 22:58 virtioa.qcow2

5. Fix the permissions as usual on eve-ng.

root@eve-ng:/opt/unetlab/addons/qemu/mssonic-3.1.2# /opt/unetlab/wrappers/unl_wrapper -a fixpermissions

root@eve-ng:/opt/unetlab/addons/qemu/mssonic-3.1.2#

Now we all set to use this under EVE-NG

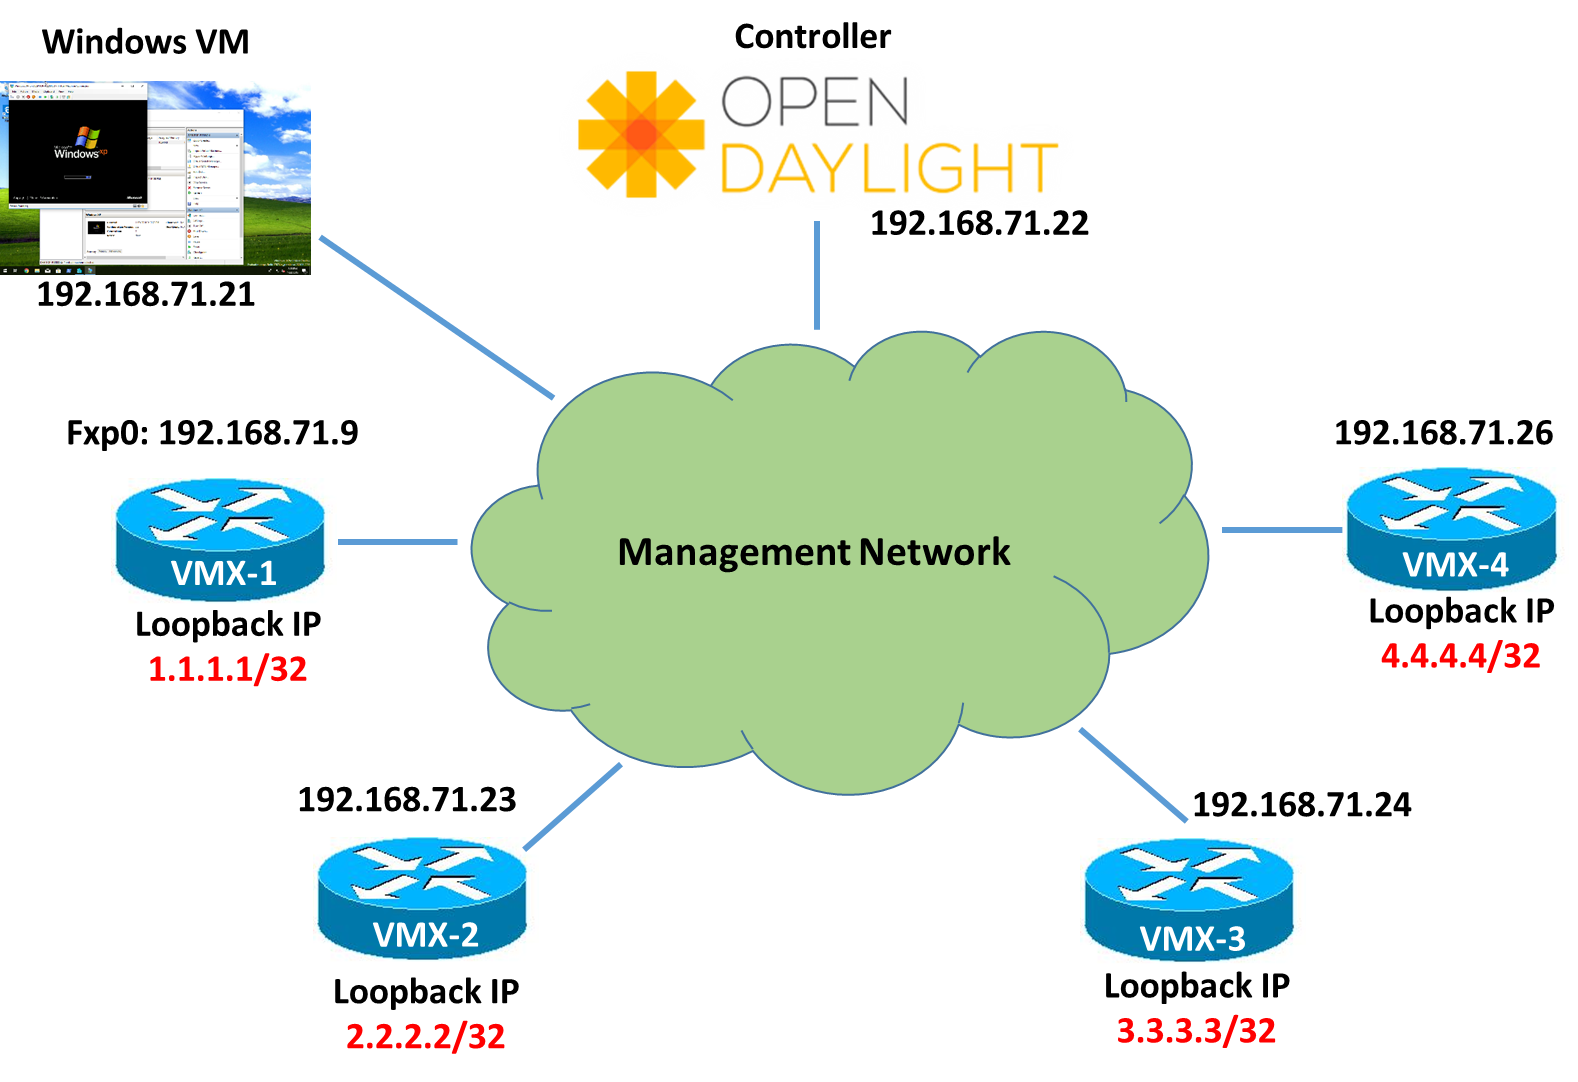
I have made a simple leaf-spine topology using Sonic Virtual Switches

6. Open the Eve-NG UI.

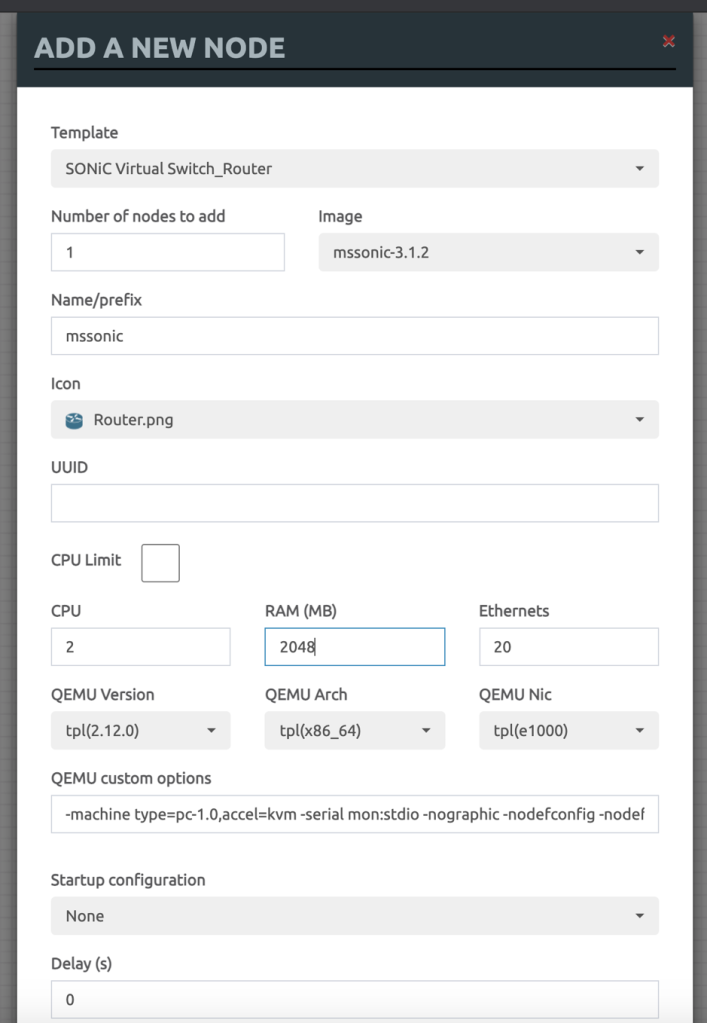
Add the new Node, and select Sonic Router as below.

7. Change any settings here if you need however defaults should be good.

8. I have built a simple Leaf-Spine topology using 4 Sonic VS.

9. Start one or more Switches and let it boot.

Trying 172.16.137.130…

Connected to 172.16.137.130.

Escape character is ‘^]’.

Jul 31 15:30:59.295935 2021 sonic INFO sonic-ztp[3850]: ZTP service started.

Jul 31 15:30:59.295971 2021 sonic INFO sonic-ztp[3850]: Failed to set system MAC address as the random number generator seed input.

Jul 31 15:30:59.295999 2021 sonic INFO sonic-ztp[3850]: Checking running configuration to load ZTP configuration profile.

Jul 31 15:30:59.893505 2021 sonic INFO sonic-ztp[3845]: Waiting for system online status before continuing ZTP. (This may take 30–120 seconds).

Debian GNU/Linux 9 sonic ttyS0

Jul 31 15:31:34.932822 System is ready

Jul 31 15:31:36.290136 2021 sonic INFO sonic-ztp[3845]: System is ready to respond.

Jul 31 15:31:36.308466 2021 sonic INFO sonic-ztp[3850]: Link up detected for interface Ethernet0

Jul 31 15:31:36.308525 2021 sonic INFO sonic-ztp[3850]: Link up detected for interface Ethernet1

Jul 31 15:31:36.308554 2021 sonic INFO sonic-ztp[3850]: Link up detected for interface Ethernet2

Jul 31 15:31:36.308581 2021 sonic INFO sonic-ztp[3850]: Link up detected for interface Ethernet3

Jul 31 15:31:36.308609 2021 sonic INFO sonic-ztp[3850]: Link up detected for interface Ethernet4

Jul 31 15:31:36.308637 2021 sonic INFO sonic-ztp[3850]: Link up detected for interface Ethernet5

Jul 31 15:31:36.308664 2021 sonic INFO sonic-ztp[3850]: Link up detected for interface Ethernet6

Jul 31 15:31:36.308741 2021 sonic INFO sonic-ztp[3850]: Link up detected for interface Ethernet7

Jul 31 15:31:36.308769 2021 sonic INFO sonic-ztp[3850]: Link up detected for interface Ethernet8

Jul 31 15:31:36.308821 2021 sonic INFO sonic-ztp[3850]: Link up detected for interface Ethernet9

Jul 31 15:31:36.308850 2021 sonic INFO sonic-ztp[3850]: Link up detected for interface Ethernet10

Jul 31 15:31:36.309163 2021 sonic INFO sonic-ztp[3850]: Link up detected for interface Ethernet11

Jul 31 15:31:36.340452 2021 sonic INFO sonic-ztp[3850]: Link up detected for interface Ethernet12

Jul 31 15:31:36.340489 2021 sonic INFO sonic-ztp[3850]: Link up detected for interface Ethernet13

Jul 31 15:31:36.340761 2021 sonic INFO sonic-ztp[3850]: Link up detected for interface Ethernet14

Default username/pwd – admin/YourPaSsWoRd

10. Once up and running, you would see lots of ztp related messages which can be disabled using below command.

sudo config ztp disable

sudo config save -y

11. Once done, you can go into sonic cli, using sonic-cli

admin@sonic:~$ sonic-cli

sonic#

sonic#

sonic# ?

  clear        Clear commands

  configure    Enter configuration mode

  copy         Perform file copy operations

  exit         Exit from the CLI

  fast-reboot  fast-reboot [options] (-h shows help)

  image        Image related commands

  logger       Enter messages into the system log

  no           No commands under Exec mode

  ping         Send ICMP ECHO_REQUEST to network hosts

  ping6        Send ICMPv6 ECHO_REQUEST to network hosts

  reboot       reboot [options] (-h shows help)

  renew        Renew commands

  show         Show running system information

  terminal     Set terminal settings

  tpcm         SONiC image installation manager

  traceroute   Print the route packets take to the host

  traceroute6  Print the route packets take to the IPv6 host

  warm-reboot  warm-reboot [options] (-h shows help)

  write        Save config

sonic#

to prove its working, lets configure IP Addresses on Interfaces and see if we can ping each other.

On Leaf-1:

sonic(config)# hostname leaf-1

leaf-1#

leaf-1#

leaf-1#

leaf-1#

leaf-1# show running-configuration interface Ethernet 0

!

interface Ethernet0

 mtu 9100

 speed 25000

 fec none

 no shutdown

 ip address 10.10.10.2/30

leaf-1#

On Spine-1:

spine-1# show running-configuration interface Ethernet0

!

interface Ethernet0

 mtu 9100

 speed 25000

 fec none

 no shutdown

 ip address 10.10.10.1/30

spine-1#

12. Ping the other end to find everything is working

spine-1# ping 10.10.10.2

PING 10.10.10.2 (10.10.10.2) 56(84) bytes of data.

64 bytes from 10.10.10.2: icmp_seq=1 ttl=64 time=5.32 ms

64 bytes from 10.10.10.2: icmp_seq=2 ttl=64 time=1.34 ms

^C

— 10.10.10.2 ping statistics —

2 packets transmitted, 2 received, 0% packet loss, time 1001ms

rtt min/avg/max/mdev = 1.349/3.336/5.323/1.987 ms

spine-1#

That’s all, hope you like it.. In next sessions, we can go through some more specific scenarios around it.

Service Assurance with Juniper Paragon Active Assurance (Netrounds)

Hi All, hope you all are well.

In this blog, will look at Juniper’s recent acquisition called Netrounds. Netrounds have been rebranded as Paragon Active Assurance (PAA) which is part of Paragon Automation portfolio and is a programmable, active test and monitoring solution for physical, hybrid, and virtual networks. Unlike passive monitoring approaches, Paragon Active Assurance uses active, synthetic traffic to verify application and service performance at the time of service delivery and throughout the life of the service.

There are various features of PAA however in nutshell, operations teams can use PAA to identify, understand, troubleshoot, and resolve issues before your end users even notice them. This service performance visibility can help decrease incident resolution time by as much as 50%, resulting in greater end-user satisfaction and retention.

We will be using simple topology consisting of a Controller, Test Agents and 2 vMXs to model it in EVE-NG.

eve-ng netrounds juniper active assurance
EVE-NG Topology

Controller has been instantiated by spinning clean Ubuntu 18.04.05 LTS VM and then added the required controller packages.
 
You can get the Controller up and running by following the below URL:
 
https://www.juniper.net/documentation/us/en/software/active-assurance3.0.0/paa-install/topics/concept/install-os-software.html
 
Controller Version: 3.0.0
vMX version: 18.2R2-S4
Test Agent: 3.0.0.23

Once the controller is up and running and has been licensed, you can open the UI page on the its management address.

In my case its on https://192.168.8.113/ and you will be presented with login screen where after getting authenticated, you will land on Dashboard page.

For us, as expected nothing is here as no configuration has been added via UI.

Once controllers are up, we will add Test Agents (TA) to manage all from single pane of glass.

We will add 2 TAs, and for that we need to build new Linux VM however this time its all prepackaged VM in .qcow2 format which we can download from Controller UI.

Download the .qcow2 format, disk image.

Once downloaded, we will boot the VM using this Qemu image and will get the Test Agent up and running. Now we need to open console to TEST Agent and add the Controller IP in format: <controller-ip>:6000

6000 is important as TA and Controller talk on this port. If you have firewall in between, make sure to allow this port.

Once both TAs are added, they will be shown in the Test Agents Section on the left menu of the Controller as below.

Click on each Test Agent and configure the IP Addresses on Revenue port. In my case its eth1 which is connected to vMXs.

Before we delve more into TAs, let me give you run down of vMXs.

vMXs have OSPF, LDP, RSVP, BGP, running between them. I have configured L2VPN CCC between 2 VMXs.

As you can see below, interface towards TA1 is in vlan 601 and hence we need to accordingly add 601 vlan on TA1 and assign the IP. In my case, I have defined 20.20.20.1/24.

root@vMX-1> show mpls lsp
Ingress LSP: 1 sessions
To From State Rt P ActivePath LSPname
2.2.2.2 1.1.1.1 Up 0 * vmx1-to-vmx2
Total 1 displayed, Up 1, Down 0

Egress LSP: 1 sessions
To From State Rt Style Labelin Labelout LSPname
1.1.1.1 2.2.2.2 Up 0 1 FF 299808 - vmx2-to-vmx1
Total 1 displayed, Up 1, Down 0

Transit LSP: 0 sessions
Total 0 displayed, Up 0, Down 0

root@vMX-1> show connections
CCC and TCC connections [Link Monitoring On]
Legend for status (St): Legend for connection types:
UN -- uninitialized if-sw: interface switching
NP -- not present rmt-if: remote interface switching
WE -- wrong encapsulation lsp-sw: LSP switching
DS -- disabled tx-p2mp-sw: transmit P2MP switching
Dn -- down rx-p2mp-sw: receive P2MP switching
-> -- only outbound conn is up Legend for circuit types:
<- -- only inbound conn is up intf -- interface
Up -- operational oif -- outgoing interface
RmtDn -- remote CCC down tlsp -- transmit LSP
Restart -- restarting rlsp -- receive LSP

Connection/Circuit Type St Time last up # Up trans
l2vpn-1 rmt-if Up Mar 5 13:02:14 2
ge-0/0/1.601 intf Up
vmx1-to-vmx2 tlsp Up
vmx2-to-vmx1 rlsp Up

Another important consideration to make is NTP. Make sure NTP is synced properly on TAs before running the test. You can use any NTP server for this or make your controller as NTP server.

That’s all for vMXs, let me know if you have any particular query on it. We will look at TAs now.

To start the test, Click on ‘New Monitor’ under Monitoring option on left hand menu.

Fill the details and select Element. In our case we have selected 2 Elements, UDP and VOIP UDP which are basically 2 different streams with 2 different profiles going at same time.

Configure each element separately with parameters and Client and Server interface ports.

You can define the threshholds here and frame rates, dscp value of streams.

Press the start button. Once started, we can verify the traffic on vMXs in both Input and Output direction below which suggests that bidirectional traffic is working.


root@vMX-1> show interfaces ge-0/0/1 | match rate | refresh 1

---(refreshed at 2021-03-05 13:22:05 UTC)---

  Input rate     : 185792 bps (59 pps)

  Output rate    : 185792 bps (59 pps)

    FEC Corrected Errors Rate               0

    FEC Uncorrected Errors Rate             0

---(refreshed at 2021-03-05 13:22:06 UTC)---

  Input rate     : 185792 bps (59 pps)

  Output rate    : 185792 bps (59 pps)

    FEC Corrected Errors Rate               0

    FEC Uncorrected Errors Rate             0

---(refreshed at 2021-03-05 13:22:07 UTC)---

  Input rate     : 188064 bps (59 pps)

  Output rate    : 188064 bps (59 pps)

    FEC Corrected Errors Rate               0

    FEC Uncorrected Errors Rate             0

---(refreshed at 2021-03-05 13:22:08 UTC)---

  Input rate     : 188064 bps (59 pps)

  Output rate    : 188064 bps (59 pps)

    FEC Corrected Errors Rate               0

    FEC Uncorrected Errors Rate             0

---(refreshed at 2021-03-05 13:22:09 UTC)---

  Input rate     : 187680 bps (59 pps)

  Output rate    : 187680 bps (59 pps)

    FEC Corrected Errors Rate               0

    FEC Uncorrected Errors Rate             0

---(refreshed at 2021-03-05 13:22:10 UTC)---

  Input rate     : 187680 bps (59 pps)

  Output rate    : 187680 bps (59 pps)

    FEC Corrected Errors Rate               0

    FEC Uncorrected Errors Rate             0

---(refreshed at 2021-03-05 13:22:11 UTC)---

Once stopped. Click on the report at the top and you will get the status of test along with results and graphs.

That’s all from this blog. Its just an introduction to PAA however its capable of doing much much more. We can use the RPM/TWAMP on Routers to get the 2 way or Round trip time measurements from the network which can give you edge before handing over the network to your customers for actual traffic and proactively troubleshoot for any issues.

That’s all for this. I will add more test in next blogs, however till then let me know if you have any queries.

Mohit

Juniper Config Backup on GITLAB

Hi All

In this blog, we will see how we can take the backup of router configs and push it to gitlab for version control.

We will take Juniper routers here for example and build the script in Python and run our task as a cronjob on CentOS 7 to automatically backup the configs onto GITLAB.
We will use power of Git here to store the differentials in configs and we can see the differences in Gitlab UI.

So let’s see how we can achieve it.
Before starting with config backup, let’s build the device store on which we will be running the script or in other words backup will be running. For this we are storing the values in YAML file http://yaml.org/ as dictionary. You can either store the values as list or Dictionary in YAML. You can use json also to store the same data instead of YAML.

Yaml file (.yml)
---
# Add devices here in form Hostname: 'ip address'
  Manchester_MX10003: '10.198.206.3'
  Glasgow_MX10003: '10.198.206.6'
  London_MX104: '10.198.206.9'
  Leeds_MX104: '10.198.206.12'
  Bristol_MX104: '10.198.206.15'

Above are the file contents, where we are storing the data as Key, Value pair where Key is hostname of device and Values are its IP Addresses.

Now our data store is done, we can start with Juniper PYez (https://www.juniper.net/documentation/en_US/junos-pyez/topics/concept/junos-pyez-overview.html) to get the configs first.

We will be importing the Pyez modules, set the .yml input file location and run ‘for’ loop on our dictionary. We will store the backup config files as .txt file with hostnames as Title for easy accessibility. Don’t forget to import yaml module as we will be working on yaml file.

from jnpr.junos import Device
from jnpr.junos.exception import ConnectError
import yaml

input_file = '/home/sun/gitlab/device_list.yml'

for key, value in yaml.load(open(input_file)).items():

    dev_username = test
    dev_password = test
    dev = Device(host=value, user=dev_username, passwd=dev_password, port='830')

    try:
        dev.open()
    except ConnectError as err:
        print ("Cannot connect to device: {0}".format(err))
        sys.exit(1)
    except Exception as err:
        print (err)
        sys.exit(1)

    config = str(dev.cli("show configuration | no-more", warning=False))

    #####Create/Write to Config to File

    file_name = key + '.txt'


   dev.close()

That was pretty simple. Let me know if you have any issues. Now let’s work out how to push it to GIT.

We will be using the subprocess module to do this work for us where we will be running series of commands in serial to put the files across the gitlab. You are starting by going into particular directory which is your starting git project directory. You are looking at each branch within your git project using ‘git branch’ command and then checking out a particular branch on which you to work or store the data. In our case it’s Core_Network. Once you have moved to that, you can move into other specific folders and ‘mv’ your backup .txt files into this folder.

Once that is done, you will use git commands, like ‘git add –all’ to add all files as part of staging. ‘git commit –m “some description”’ to commit the files and then use ‘git push’ to push them to remote gitlab server.

Code will be:

from subprocess import PIPE
from subprocess import Popen
import sys
import os
import yaml
cmds =['cd /home/sun/gitlab/athena-test', 'git branch', 'ls -l', 'git checkout " Core_Network"', 'cd "Core Network"', 'cd "Device backups"', 'mv /home/sun/gitlab/*.txt /home/sun/gitlab/athena-test/"Core Network"/"Device backups"/', 'git add --all', 'git commit -m "Updated config files"', 'git push' ]
encoding = 'utf8'
p = Popen('/bin/sh', stdin=PIPE, stdout=PIPE, stderr=PIPE)
for cmd in cmds:
p.stdin.write(cmd + "\n")
p.stdin.close()
#print p.stdout.read()
print "Push to GitLab Completed"

One main thing you have to keep in mind is that you won’t be able to push the files until unless you have some remote servers configured under your server.

For example, mine is below where I have removed certain values and replaced them with xxx, yyy and ip address.. xxx is username, yyy is password and hostname  is gitlab server address.

sun@ $ git remote -v
origin https://xxx:yyy@<hostname>/athena-test.git (fetch)
origin https://xxx:yyy@<hostname>/athena-test.git (push)

Let’s see this in action by changing the config on one of the router.

write@re0.Manchester.MX10003.uk> edit
Entering configuration mode

write@re0.Manchester.MX10003.uk# run show configuration system services ssh
root-login allow;
protocol-version v2;
max-sessions-per-connection 32;
connection-limit 20;
rate-limit 10;

[edit]
write@re0.Manchester.MX10003.uk# set system services ssh connection-limit 10

[edit]
write@re0.Manchester.MX10003.uk# show | compare
[edit system services ssh]
- connection-limit 20;
+ connection-limit 10;

[edit]
write@re0.Manchester.MX10003.uk# commit
commit complete

Run the script now from CentOS Server

sun@ pwd

/home/sun/gitlab

sun@ $ python git_config_backup.py

Successfully Collected Configuration from Device: Bristol_MX104

Successfully Collected Configuration from Device: Manchester_MX10003

Successfully Collected Configuration from Device: Glasgow_MX10003

Successfully Collected Configuration from Device: London_MX104

Successfully Collected Configuration from Device: Leeds_MX104

Push to GitLab Completed


You can see config was pushed and if we see the gitlab, it’s clearly showing the difference from the previous backup it had. Red one is one that is removed and Green one is what has been added.

So you can use this utility as version control of your configs and once you are happy with the configs you can push them to master for production use 🙂


Gitlab
GitLab side by side comparison


One last thing, if you have to run this as a cronjob on Centos, just edit the crontab file using ‘crontab –e’ and add the path to the script and at what particular time you want to run and that’s all.

I hope you liked this blog. Let me know if you have any queries.


Regards

Mohit

PCEP Initiated LSP using OpenDayLight and Juniper vMX

Hi All

In this post, we will look at Open day light controller working with Juniper vMXs and how we can use the controller to get the BGP, BGP-LS and PCEP working. Once everything is up and running we will use the Controller to initiate the PCEP initiated MPLS LSPs between 2 VMXs.

Sounds interesting? Let’s see how we can achieve this.

Before I go further, if you want to check anything on PCEP and some of its concept, I did a post on Juniper Northstar Controller some time ago which you can check.

https://networkzblogger.com/2017/03/17/juniper-northstar-wan-sdn-controller/

Below is the topology we will be using where all Juniper VMXs are loaded in Virtual Control Plane mode and they have fxp0 interface in 192.168.71.x subnet. Open day light controller version is Nitrogen and we have booted it on CentOS 7.5 version.

There is Windows VM in same subnet also from where we will run the REST APIs calls to Open day light using POSTMAN App.

Topology Diagram
Topology Diagram


We will divide the post into 3 parts.

  • Configuring BGP/BGP-Link state between ODL and 192.168.71.24 VMX-3.
  • Configuring PCEP session between all VMXs and ODL
  • Initiate MPLS LSP from ODL using PCEP

I am assuming that you already know how to start an ODL controller. However if you don’t know let me know and I can help you.

So lets start with 1) Configuring BGP/BGP-Link state between ODL and 192.168.71.24 VMX-3.

If you already don’t know, Open day light versions in recent times doesn’t come auto-installed with all the features. You have to manually add them. You don’t need to download them individually. It’s just you need to activate them.

We will be configure the BGP and BGP-LS on VMX-3 first

Standard BGP config with IPv4 Unicast address family however for BGP-LS we have to enable a separate family traffic-engineering additionally.

root@VMX-3> show configuration protocols bgp
group opendaylight {
 type internal;
 description Controller;
 local-address 192.168.71.24;
 family inet {
 unicast;
 }
 family traffic-engineering {
 unicast;
 }
 peer-as 2856;
 neighbor 192.168.71.22;
}

On ODL side, First install the BGP and restconf feature on karaf console using command

feature:install odl-restconf odl-bgpcep-bgp

Then using REST API we will enable the BGP Router-ID with Link State family

POST URL : 192.168.71.22:8181/restconf/config/openconfig-network-instance:network-instances/network-instance/global-bgp/openconfig-network-instance:protocols

POST Request_BGP Router ID

Then Configure the peer 192.168.71.24 with specific BGP Parameters and families

POST URL: 192.168.71.22:8181/restconf/config/openconfig-network-instance:network-instances/network-instance/global-bgp/openconfig-network-instance:protocols/protocol/openconfig-policy-types:BGP/bgp-test-odl/bgp/neighbors

POST Request_BGP Peer

We can check the status of BGP peering off course from VMX side but let’s see what comes up from ODL side

GET URL: 192.168.71.22:8181/restconf/operational/bgp-rib:bgp-rib/rib/bgp-test-odl/peer/bgp:%2F%2F3.3.3.3

GET Request_BGP Peering

From VMX side:

root@VMX-3> show bgp neighbor
Peer: 192.168.71.22+27755 AS 2856 Local: 192.168.71.24+179 AS 2856
 Description: Controller
 Group: opendaylight Routing-Instance: master
 Forwarding routing-instance: master
 Type: Internal State: Established Flags: <Sync>
 Last State: OpenConfirm Last Event: RecvKeepAlive
 Last Error: None
 Options: <Preference LocalAddress LogUpDown AddressFamily PeerAS Refresh>
 Options: <VpnApplyExport DropPathAttributes>
 Address families configured: inet-unicast te-unicast
 Path-attributes dropped: 128
 Local Address: 192.168.71.24 Holdtime: 90 Preference: 170
 Number of flaps: 2
 Last flap event: RecvNotify
 Error: 'Cease' Sent: 0 Recv: 33
 Peer ID: 192.168.71.22 Local ID: 3.3.3.3 Active Holdtime: 90
 Keepalive Interval: 30 Group index: 0 Peer index: 0 SNMP index: 0
 I/O Session Thread: bgpio-0 State: Enabled
 BFD: disabled, down
 NLRI for restart configured on peer: inet-unicast te-unicast


BGP-LS configuration we did will be used to advertise the Traffic Engineering database to Controller. You can see the routes advertised using lsdist.0 table in juniper.

Snippet below:

root@VMX-3> show route table lsdist.0
lsdist.0: 11 destinations, 11 routes (11 active, 0 holddown, 0 hidden)
+ = Active Route, - = Last Active, * = Both
NODE { AS:2856 Area:0.0.0.0 IPv4:2.2.2.2 OSPF:0 }/1152
 *[OSPF/10] 02:02:38
 Fictitious
NODE { AS:2856 Area:0.0.0.0 IPv4:3.3.3.3 OSPF:0 }/1152
 *[OSPF/10] 02:02:43
 Fictitious
NODE { AS:2856 Area:0.0.0.0 IPv4:4.4.4.4 OSPF:0 }/1152
 *[OSPF/10] 02:02:38
 Fictitious
NODE { AS:2856 Area:0.0.0.0 IPv4:4.4.4.4-192.168.71.26 OSPF:0 }/1152
 *[OSPF/10] 02:02:31
 Fictitious
LINK { Local { AS:2856 Area:0.0.0.0 IPv4:2.2.2.2 }.{ IPv4:192.168.71.23 } Remote { AS:2856 Area:0.0.0.0 IPv4:4.4.4.4-192.168.71.26 }.{ } OSPF:0 }/1152
 *[OSPF/10] 02:02:31
 Fictitious
..
…
…


2) Now let’s configure the PCEP

On VMX (This will be repeated on all with change in local address)

root@VMX-3> show configuration protocols pcep
pce odl {
 local-address 192.168.71.24;
 destination-ipv4-address 192.168.71.22;
 destination-port 4189;
 pce-type active stateful;
 lsp-provisioning;
 p2mp-lsp-report-capability;
}

If you have any firewall, make sure to allow port 4189 between Controller and VMXs.

On ODL, we need to install odl-bgpcep-pcep feature

There is no other config to do. As soon as you install this feature, you should see PCEP status up.

Let’s see it from VMX-4


root@VMX-4> show path-computation-client status
Session Type            Provisioning Status
odl     Stateful Active On           Up

LSP Summary
 Total number of LSPs : 0
 Static LSPs : 0
 Externally controlled LSPs : 0
 Externally provisioned LSPs : 0/16000 (current/limit)
 Orphaned LSPs : 0

odl (main)
 Delegated : 0
 Externally provisioned : 0

From ODL side:

GET Request_PCEP Status

3)      PCEP Initiated LSP

Now, we will configure the LSP from VMX-3 to VMX-4 between their Loopback IPs.

POST URL: 192.168.71.22:8181/restconf/operations/network-topology-pcep:add-lsp

You can see we haven’t given any ERO while provisioning the LSP. ODL has auto calculated the path and you can verify in VMX-3

PCEP LSP ADD with No Ero

root@VMX-3> show mpls lsp name test-pcep-2 extensive
Ingress LSP: 1 sessions

4.4.4.4
 From: 3.3.3.3, State: Up, ActiveRoute: 0, LSPname: test-pcep-2
 ActivePath: (primary)
 LSPtype: Externally provisioned, Penultimate hop popping
 LSP Control Status: Externally controlled
 LoadBalance: Random
 Encoding type: Packet, Switching type: Packet, GPID: IPv4
 LSP Self-ping Status : Enabled
 *Primary State: Up, Preference: 200
 Priorities: 0 0
 External Path CSPF Status: external
 SmartOptimizeTimer: 180
 Flap Count: 0
 MBB Count: 0
 Received RRO (ProtectionFlag 1=Available 2=InUse 4=B/W 8=Node 10=SoftPreempt 20=Node-ID):
 192.168.71.26(Label=0)
 12 May 24 12:10:08.334 Self-ping ended successfully
 11 May 24 12:10:07.830 EXTCTRL LSP: Sent Path computation request and LSP status
 10 May 24 12:10:07.830 EXTCTRL_LSP: Computation request/lsp status contains: signalled bw 0 req BW 0 admin group(exclude 0 include any 0 include all 0) priority setup 0 hold 0
 9 May 24 12:10:07.829 Selected as active path
 8 May 24 12:10:07.828 EXTCTRL LSP: Sent Path computation request and LSP status
 7 May 24 12:10:07.828 EXTCTRL_LSP: Computation request/lsp status contains: signalled bw 0 req BW 0 admin group(exclude 0 include any 0 include all 0) priority setup 0 hold 0
 6 May 24 12:10:07.828 Up
 5 May 24 12:10:07.828 Self-ping started
 4 May 24 12:10:07.828 Self-ping enqueued
 3 May 24 12:10:07.828 Record Route: 192.168.71.26(Label=0)
 2 May 24 12:10:07.824 Originate Call
 1 May 24 12:10:07.824 EXTCTRL_LSP: Received setup parameters ::
 Created: Thu May 24 12:10:07 2018
Total 1 displayed, Up 1, Down 0


You can do various operations like Deleting LSP, Modifying LSP etc from REST API.

One thing which we can’t do at the moment using PCEP is configuring Point to Multipoint LSP as standard is still being drafted for this but I hope it will come out soon.

So that’s all for now, I hope you enjoyed it and let me know your feedback.


Regards

Mohit


JunOS Automation using PyEZ and Northstar REST APIs

Hi All, in this session lets discuss some Automation.

During past few days, I was looking at some REST APIs for Juniper Northstar Controller. Now Northstar is good for LSP creation/deletion/modification but it cant configure the service E2E. Offcourse that tool is not meant to do all this but Juniper has recently released one beta version of it which can bind your LSP to some service which is excellent step forward. We will see that in a moment. Juniper is leveraging Jinja templates in NS to achieve this binding.

However as I said still service creation is not E2E and for that I thought of adding one more layer of automation and for this I have used Juniper own PyEZ framework which is basically Juniper Python library for automating tasks. Brilliant lets see how this work.

Juniper PyEZ is a framework which is easily grasped by Network engineers and you don’t need to be programmer to fully understand it.

https://www.juniper.net/documentation/en_US/junos-pyez/topics/concept/junos-pyez-overview.html

REST (REpresentational State Transfer) is a set of useful conventions and principals about transfer of information over the World Wide Web.

Many Web services are now using the principals of REST in their design.

When you type a URL into your browser, like http://example.net, your browser software creates an HTTP header that identifies:

  • a desired action: GET (“get me this resource”).
  • a target machine (www.domain-name.com).

The NorthStar RESTful APIs are designed to enable access over HTTP to most of the same data and analytics that are available to you from both the NorthStar GUI and the NorthStar CLI.

https://www.juniper.net/documentation/en_US/northstar3.1.0/information-products/api-ref/api-ref.html

Below is the pictorial representation of what we will be doing. I have used a Windows server on which we will write a script which will talk to Northstar using REST APIs and other components of Juniper Pes using PyEZ.

L2VPN CCC
Automation Model


Our Script will be written in Python and you can write the variables value in excel and pass it to the script.

Our excel format:

L2VPN_CCC_Data

import httplib
import json
import time
import re
import sys
import pandas as pd
from jnpr.junos import Device
from jnpr.junos.utils.config import Config
from pprint import pprint

df = pd.read_excel("L2VPN_CCC_Data.xlsx","Sheet1")

PE1 = str((df['PE1'].values.tolist())[0])
PE2 = str((df['PE2'].values.tolist())[0])
Interface_PE1 = str((df['Interface_PE1'].values.tolist())[0])
Unit_PE1 = str((df['Unit_PE1'].values.tolist())[0])
Vlan_PE1 = str((df['Vlan_PE1'].values.tolist())[0])
Interface_PE2 = str((df['Interface_PE2'].values.tolist())[0])
Unit_PE2 = str((df['Unit_PE2'].values.tolist())[0])
Vlan_PE2 = str((df['Vlan_PE2'].values.tolist())[0])
LSP_Name_PE1 = str((df['LSP_Name_PE1'].values.tolist())[0])
LSP_Name_PE2 = str((df['LSP_Name_PE2'].values.tolist())[0])
VPN_CCC_PE1 = str((df['VPN_CCC_PE1'].values.tolist())[0])
VPN_CCC_PE2 = str((df['VPN_CCC_PE2'].values.tolist())[0])

dev1 = Device(host=''+PE1+'', user='demo', password='password', port='22')
dev1.open()
dev1.timeout = 300

with Config(dev1, mode='private') as cu: 
cu.load('set interfaces '+Interface_PE1+' unit '+Unit_PE1+' description L2VPN-CCC encapsulation vlan-ccc vlan-id '+Vlan_PE1+' family ccc', format='set')
cu.pdiff() #Printing the difference in the configuration after the load
cu.commit()

dev1.close()
dev2 = Device(host=''+PE2+'', user='demo', password='password', port='22')
dev2.open()
dev2.timeout = 300

with Config(dev2, mode='private') as cu: 
cu.load('set interfaces '+Interface_PE2+' unit '+Unit_PE2+' description L2VPN-CCC encapsulation vlan-ccc vlan-id '+Vlan_PE2+' family ccc', format='set')
cu.pdiff() #Printing the difference in the configuration after the load#
cu.commit() #commit#

dev2.close()
conn = httplib.HTTPConnection('10.198.123.180:8091')
Bandwidth = raw_input('Please enter LSP Bandwidth on '+PE1+' (e.g 100k): ')
Setup_Pri = raw_input('Please enter Set up Priority: ')
Hold_Pri = raw_input('Please enter Hold Priority: ')
payload = str('{\r\n\"name\": \"'+LSP_Name_PE1+'\",\r\n\"creationConfigurationMethod\": \"NETCONF\",\r\n\"provisioningType\": \"RSVP\",\r\n  \"pathType\": \"primary\",\r\n  \"from\": {\r\n\"topoObjectType\": \"ipv4\",\r\n\"address\": \"'+PE1+'\"\r\n },\r\n  \"to\": {\r\n\"topoObjectType\": \"ipv4\",\r\n\"address\": \"'+PE2+'\"\r\n},\r\n\"plannedProperties\": {\r\n\"bandwidth\": \"'+Bandwidth+'\",\r\n\"setupPriority\": '+Setup_Pri+',\r\n\"holdingPriority\": '+Hold_Pri+',\r\n\"userProperties\": {\r\n \"ccc-vpn-name\": \"'+VPN_CCC_PE1+'\",\r\n \"ccc-interface\": \"'+Interface_PE1+'.'+Unit_PE1+'\",\r\n\"transmit-lsp\": \"'+LSP_Name_PE1+'\",\r\n\"receive-lsp\": \"'+LSP_Name_PE2+'\"\r\n    }\r\n  }\r\n}\r\n')
headers = {
 'content-type': "application/json",
'cache-control': "no-cache",
 }

conn.request ("POST", "/NorthStar/API/v2/tenant/1/topology/1/te-lsps", payload, headers
res = conn.getresponse()
data = res.read()
print 'Please wait while we get the status of LSP you created :)'
for i in xrange(25,0,-1):
 time.sleep(1)
 sys.stdout.write(str(i)+' ') 
 sys.stdout.flush()
 conn.request("GET", str('/NorthStar/API/v2/tenant/1/topology/1/te-lsps/search?name=' + LSP_Name_PE1), headers=headers
 res = conn.getresponse()
 data = res.read()

LSP_Status = re.search('operationalStatus":(.*?),', data).group(1)
if LSP_Status == '"Active"':
  print ('\nSuccess: LSP "'+LSP_Name_PE1+'" is Created and Active')
elif LSP_Status == "Down":
   print ('\nFailed: LSP "'+LSP_Name_PE1+'" is created however Down')
else:
  print ('\nFailed: LSP "'+LSP_Name_PE1+'" is not created and is in Unknown State on Northstar')

time.sleep(10)

conn = httplib.HTTPConnection('10.198.123.180:8091')
Bandwidth = raw_input('Please enter LSP Bandwidth on '+PE2+' (e.g 100k): ')
Setup_Pri = raw_input('Please enter Set up Priority: ')
Hold_Pri = raw_input('Please enter Hold Priority: ')

payload = str('{\r\n\"name\": \"'+LSP_Name_PE2+'\",\r\n\"creationConfigurationMethod\": \"NETCONF\",\r\n\"provisioningType\": \"RSVP\",\r\n  \"pathType\": \"primary\",\r\n  \"from\": {\r\n\"topoObjectType\": \"ipv4\",\r\n\"address\": \"'+PE2+'\"\r\n },\r\n  \"to\": {\r\n\"topoObjectType\": \"ipv4\",\r\n\"address\": \"'+PE1+'\"\r\n},\r\n\"plannedProperties\": {\r\n\"bandwidth\": \"'+Bandwidth+'\",\r\n\"setupPriority\": '+Setup_Pri+',\r\n\"holdingPriority\": '+Hold_Pri+',\r\n\"userProperties\": {\r\n \"ccc-vpn-name\": \"'+VPN_CCC_PE2+'\",\r\n \"ccc-interface\":\"'+Interface_PE2+'.'+Unit_PE2+'\",\r\n\"transmit-lsp\": \"'+LSP_Name_PE2+'\",\r\n\"receive-lsp\": \"'+LSP_Name_PE1+'\"\r\n    }\r\n  }\r\n}\r\n')
headers = {
 'content-type': "application/json",
 'cache-control': "no-cache",
   }

conn.request ("POST", "/NorthStar/API/v2/tenant/1/topology/1/te-lsps", payload, headers)
res = conn.getresponse()
data = res.read()
print 'Please wait while we get the status of LSP you created :)'
for i in xrange(25,0,-1):
   time.sleep(1)
   sys.stdout.write(str(i)+' ')
   sys.stdout.flush()

conn.request("GET", str('/NorthStar/API/v2/tenant/1/topology/1/te-lsps/search?name=' + LSP_Name_PE2), headers=headers)
res = conn.getresponse()
data = res.read()
LSP_Status = re.search('operationalStatus":(.*?),', data).group(1)
if LSP_Status == '"Active"':
    print ('\nSuccess: LSP "'+LSP_Name_PE2+'" is Created and Active')
elif LSP_Status == "Down":
    print ('\nFailed: LSP "'+LSP_Name_PE2+'" is created however Down')
else:
    print ('\nFailed: LSP "'+LSP_Name_PE2+'" is not created and is in Unknown State on Northstar')

time.sleep(5)

dev1.open()
dev2.open()

print (dev1.cli('show connections remote-interface-switch '+VPN_CCC_PE1+'', warning=False))

print (dev2.cli('show connections remote-interface-switch '+VPN_CCC_PE2+'', warning=False))

dev1.close()
dev2.close()

In this script we are making reading the values from the excel and using it as variables in or script.

After that using PyEZ, making a SSH connection to PE1 and PE2 and configuring the layer 2 sub-interfaces with vpn-ccc encapsulations. Once that is done, connection to Northstar server 10.198.123.180 using httplib libraris/modules is made and waiting for Northstar to configure the LSP. At this stage Northstar is also binding that LSPs in connections using Jinja template. Once Northstar has created the LSPs we are using regular expression to get the LSP Index from Northstar and checking whether LSP creating in Success or failed.

At last we are printing the show command output to find out if everything is up and running 🙂

Lets see by running the script

C:\Program Files (x86)\Python\Northstar_Scripts\Working\Juniper\L2VPN_CCC>python
 E2E_L2VPN_CCC_Script.py
[edit interfaces xe-2/0/0]
+ unit 601 {
+ description L2VPN-CCC;
+ encapsulation vlan-ccc;
+ vlan-id 601;
+ family ccc;
+ }
[edit interfaces xe-2/0/0]
+ unit 601 {
+ description L2VPN-CCC;
+ encapsulation vlan-ccc;
+ vlan-id 601;
+ family ccc;
+ }
Please enter LSP Bandwidth on 10.198.123.100 (e.g 100k): 70m
Please enter Set up Priority: 5
Please enter Hold Priority: 0
Please wait while we get the status of LSP you created :)
25 24 23 22 21 20 19 18 17 16 15 14 13 12 11 10 9 8 7 6 5 4 3 2 1
Success: LSP "l2vpn-ccc-1" is created and is Active
Please enter LSP Bandwidth on 10.198.123.205 (e.g 100k): 70m
Please enter Set up Priority: 5
Please enter Hold Priority: 0
Please wait while we get the status of LSP you created :)
25 24 23 22 21 20 19 18 17 16 15 14 13 12 11 10 9 8 7 6 5 4 3 2 1
Success: LSP "l2vpn-ccc-2" is created and is Active
CCC and TCC connections [Link Monitoring On]
Legend for status (St): Legend for connection types:
 UN -- uninitialized if-sw: interface switching
 NP -- not present rmt-if: remote interface switching
 WE -- wrong encapsulation lsp-sw: LSP switching
 DS -- disabled tx-p2mp-sw: transmit P2MP switching
 Dn -- down rx-p2mp-sw: receive P2MP switching
 -> -- only outbound conn is up Legend for circuit types:
 <- -- only inbound conn is up intf -- interface
 Up -- operational oif -- outgoing interface
 RmtDn -- remote CCC down tlsp -- transmit LSP
 Restart -- restarting rlsp -- receive LSP
Connection/Circuit Type St Time last up # Up tran
s
l2vpn-ccc rmt-if Up Nov 25 12:52:10
1
 xe-2/0/0.601 intf Up
 l2vpn-ccc-1 tlsp Up
 l2vpn-ccc-2 rlsp Up

CCC and TCC connections [Link Monitoring On]
Legend for status (St): Legend for connection types:
 UN -- uninitialized if-sw: interface switching
 NP -- not present rmt-if: remote interface switching
 WE -- wrong encapsulation lsp-sw: LSP switching
 DS -- disabled tx-p2mp-sw: transmit P2MP switching
 Dn -- down rx-p2mp-sw: receive P2MP switching
 -> -- only outbound conn is up Legend for circuit types:
 <- -- only inbound conn is up intf -- interface
 Up -- operational oif -- outgoing interface
 RmtDn -- remote CCC down tlsp -- transmit LSP
 Restart -- restarting rlsp -- receive LSP

Connection/Circuit Type St Time last up # Up tran
s
l2vpn-ccc rmt-if Up Nov 25 12:52:11
1
 xe-2/0/0.601 intf Up
 l2vpn-ccc-2 tlsp Up
 l2vpn-ccc-1 rlsp Up

C:\Program Files (x86)\Python\Northstar_Scripts\Working\Juniper\L2VPN_CCC>


So that’s all for today.. You can see the possibility of using this framework in so many tasks in your daily networking journey. I hope you like this blog and will try to use it in your network 🙂

Regards

Mohit